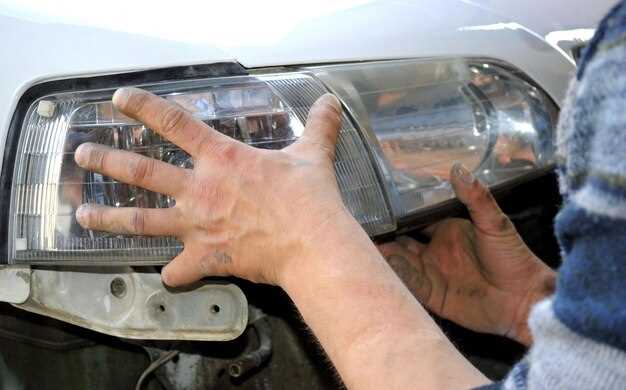
Proper lighting is essential for safe driving, especially during nighttime or adverse weather conditions. When the headlights on your Ford begin to dim or fail, it’s crucial to replace them promptly to maintain visibility and ensure your safety on the road. This step-by-step guide will help you tackle the task of replacing your Ford headlights with confidence and ease.
Replacing headlights may seem daunting, but with the right tools and guidance, you can complete the task efficiently. This article will provide you with detailed instructions to help you navigate through the process, saving you time and money by avoiding a trip to the mechanic. Our focus will be on various Ford models, addressing common issues you may encounter while working on the lighting system of your vehicle.
Before starting the replacement procedure, it’s important to gather all necessary tools and parts. By following this guide, you will learn how to inspect, remove, and install new headlights, ensuring that your Ford’s lighting not only meets safety standards but also enhances the overall driving experience. Let’s get started!
How to Replace Ford Headlights: A Step by Step Guide
Replacing the headlights on your Ford vehicle can improve visibility and enhance safety while driving at night. Follow these steps to successfully replace your Ford headlights.
First, gather the necessary tools and materials. You will need a socket set or wrench, a flathead or Phillips screwdriver, and the new headlights compatible with your Ford model. Refer to your owner’s manual to ensure you have the correct replacement parts.
Next, open the hood of your vehicle and locate the headlight assembly. Depending on the model, you may need to remove the front grille or separate covers to access the headlights more easily.
Once you have clear access, disconnect the power supply to the headlight by unplugging the electrical connector. Sometimes, you may need to release a clip or press a tab to detach the connector safely.
Remove the old headlight bulb by unscrewing it from the housing or releasing any retaining clips. Be careful not to touch the glass part of the new bulb with your bare hands, as oil and dirt can reduce its lifespan.
Insert the new headlight bulb into the socket and secure it properly. Reconnect the electrical connector to ensure the bulb receives power. Make sure everything is plugged in tightly to prevent any issues.
Before closing the assembly, test the new headlights to confirm that they are functioning correctly. Turn on your vehicle and check both low and high beam settings.
If everything is working as it should, reassemble any parts you previously removed, such as the grille or covers. Ensure all clips and screws are secured tightly to avoid rattling or misalignment.
Finally, lower the hood and take your Ford for a short drive to verify that the new headlights are performing optimally. Properly replacing the headlights will enhance your driving experience and ensure your safety on the road.
Selecting the Right Replacement Headlights for Your Ford Model

When replacing headlights on your Ford, it is crucial to choose the right type that matches the specifications of your vehicle. Different Ford models may require unique headlight designs, sizes, and types. Identifying the correct replacement headlights ensures safety and optimal performance.
Check the Owner’s Manual: The first step in selecting replacement headlights is to consult your vehicle’s owner’s manual. This document provides details on the specific headlight types compatible with your model, including bulb sizes and wattage requirements.
Types of Headlights: Ford vehicles may use various headlight technologies, including halogen, HID (high-intensity discharge), and LED (light-emitting diode). Halogen headlights are the most common and are typically cost-effective. HID headlights produce brighter illumination, while LEDs offer longevity and efficiency. Understanding the different types will help you decide on the best option for your needs.
Consider Brightness: Choose headlights that offer sufficient brightness while adhering to road safety regulations. If driving frequently at night, consider upgrading to a brighter headlight type that enhances visibility without overwhelming oncoming drivers.
Warranty and Quality: Opt for high-quality replacement headlights from reputable manufacturers. Look for products that come with a warranty, indicating confidence in the durability and performance of the headlights you select.
Electrical Compatibility: Ensure that the headlights you choose are compatible with your vehicle’s electrical system. Mismatched headlights can lead to electrical issues or poor performance. Verify that the voltage and connector type match your Ford’s specifications.
By following these guidelines, you can confidently select the right replacement headlights for your Ford model, ensuring both functionality and safety on the road.
Step-by-Step Instructions for Removing Old Ford Headlights

Removing old headlights from your Ford vehicle is a straightforward process that requires minimal tools. Follow these detailed steps to ensure you complete the task efficiently and safely.
- Gather Necessary Tools:
- Screwdriver (flathead or Phillips, depending on your model)
- Socket wrench set
- Gloves
- Clean cloth
- Prepare Your Vehicle:
- Turn off the engine and remove the keys from the ignition.
- Open the hood to access the headlight assembly.
- Disconnect the battery (optional but recommended for safety).
- Locate the Headlight Assembly:
Identify the headlight assembly that requires removal. It is usually located on the front side of the vehicle, just behind the front grille.
- Remove Any Covers or Grilles:
Using the screwdriver, remove any plastic covers or grilles that may obstruct access to the headlight assembly.
- Disconnect the Wiring Harness:
Locate the electrical connector on the back of the headlight. Press the tab or squeeze the connector to release it from the headlight.
- Unscrew the Headlight Assembly:
Using the socket wrench, unscrew the bolts or screws holding the headlight assembly in place. Keep these screws in a safe location for reinstallation.
- Remove the Headlight Assembly:
Carefully pull the headlight assembly out of the socket. Make sure there are no obstructions. If it feels stuck, gently wiggle it until it releases.
- Inspect and Clean:
Before installing new headlights, inspect the socket for any dirt or debris. Use a clean cloth to wipe away any contaminants that could affect the new lighting.
After removing the old headlights, you are ready to proceed with installing the new ones. Ensure that you follow the appropriate steps for installation to guarantee optimal performance and safety.
How to Properly Install New Headlights and Adjust Beam Alignment
Installing new headlights is crucial for maintaining visibility and safety while driving. Follow these steps to ensure a proper installation and alignment of your Ford headlights.
Step 1: Prepare the Vehicle
Begin by parking your Ford on a level surface and turning off the ignition. Open the hood to access the headlight assembly. For some Ford models, you may need to remove the battery or other components for easier access.
Step 2: Remove Old Headlights
Carefully detach the old headlights by unscrewing the retaining screws and disconnecting the electrical connectors. Keep the screws in a safe place for reinstallation.
Step 3: Install New Headlights
Take the new headlights and connect the electrical connectors securely. Align the new headlights with the mounting brackets and fasten them using the previously saved screws. Ensure that each headlight is firmly in place.
Step 4: Adjust Beam Alignment
To properly adjust the beam alignment, follow these guidelines:
| Step | Description |
|---|---|
| 1 | Position the vehicle 25 feet away from a wall or garage door, ensuring the ground is level. |
| 2 | Turn on the headlights and mark the center of each beam with tape on the wall. |
| 3 | Use the adjustment screws on the back of the headlight assembly to align the beams. The center of the beam should be at or just below the height of the headlight from the ground. |
| 4 | Confirm the adjustment by stepping back and observing the beam’s spread. Repeat adjustments if necessary. |
After aligning the beams, double-check the stability of the headlight installation. Close the hood and perform a final inspection of the headlights’ functionality. Properly installed and aligned headlights enhance safety on the road.


