


Maintaining your Ford vehicle is essential to ensure optimal performance and longevity. One of the simplest yet most crucial DIY tasks you can undertake is changing the air filter. A clean air filter plays a significant role in your engine’s efficiency, allowing for better airflow and improving fuel economy.
Over time, air filters can become clogged with dirt, debris, and other contaminants, leading to a decrease in engine performance. By regularly replacing your filter, you not only enhance the air quality entering your engine but also contribute to a healthier environment and potentially reduce the frequency of other maintenance issues.
This guide will walk you through the step-by-step process of changing the air filter in your Ford vehicle, ensuring that you have the necessary knowledge and tools to complete this task efficiently. Whether you’re a seasoned DIY enthusiast or a beginner, you’ll find that this straightforward maintenance task can be accomplished with minimal effort and maximal benefit.
Identifying the Right Air Filter for Your Ford Model
Choosing the correct air filter for your Ford vehicle is essential to ensure optimal engine performance and fuel efficiency. Start by consulting your owner’s manual, which typically lists the specific air filter model that is compatible with your vehicle. Alternatively, you can find this information on the manufacturer’s official website, where you can enter your vehicle’s year, make, and model.
When selecting a new air filter, consider both OEM (Original Equipment Manufacturer) and aftermarket options. OEM filters are designed specifically for Ford vehicles, ensuring a perfect fit and performance. Aftermarket filters, while often more affordable, vary in quality. Research reputable brands known for producing high-quality filters that meet or exceed OEM specifications.
It’s important to recognize the differences between the air filters available. There are standard paper filters, which are typically the most cost-effective, and high-performance options such as reusable or synthetic filters. DIY enthusiasts may prefer reusable filters for their long-term cost savings and reduced waste. However, always check compatibility with your specific Ford model before making a purchase.
Lastly, consider the climate and driving conditions you regularly experience. If you often drive in dusty environments or heavy traffic, you may want to opt for a filter specifically designed for such conditions. Investing in the right air filter not only enhances performance but can also extend the life of your engine.
Step-by-Step Instructions for Removing the Old Air Filter
1. Open the hood of your Ford vehicle and secure it with the prop rod. This will give you clear access to the engine compartment where the air filter is located.
2. Identify the air filter housing. It is usually a rectangular or oval-shaped box connected to the air intake duct. Consult your owner’s manual if you are unsure of its location.
3. Before removing the old air filter, inspect the surrounding area for any signs of dirt or debris that may need to be cleaned up. This will prevent contaminants from entering the engine during the replacement process.
4. Locate the clips or screws that hold the air filter housing lid in place. Depending on the model, you may need a flathead screwdriver or a socket wrench to remove them. Carefully detach these fasteners and set them aside.
5. Once the housing lid is free, gently lift it off to expose the old air filter inside. Take care not to damage any components surrounding the air filter during this process.
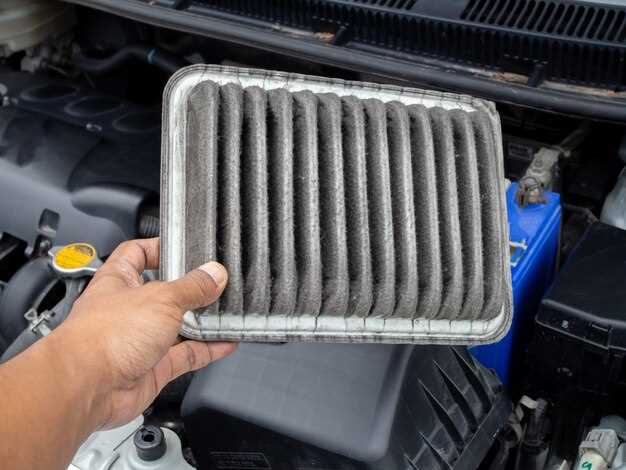
6. Grasp the old air filter and pull it straight up to remove it from the housing. Avoid shaking it, as this could release trapped dirt into the engine bay.
7. Inspect the old air filter for signs of excessive dirt or damage. This can help you gauge the importance of regular replacements in maintaining optimal engine performance.
8. Dispose of the old air filter properly, following local regulations for automotive waste. Ensure the area around the air filter housing is clean before proceeding to install the new filter.
Tips for Installing the New Air Filter Correctly

Installing a new air filter in your Ford vehicle can be a straightforward DIY task if done correctly. Here are some essential tips to ensure proper installation:
-
Choose the Right Filter:
Always select a filter that meets the specific requirements of your Ford model. Check the owner’s manual or consult with a professional to ensure compatibility.
-
Gather Necessary Tools:
Before you start, have the following tools ready:
- Flathead and Phillips screwdrivers
- Sockets and ratchets (if necessary)
- Cleaning cloth or brush
-
Prepare the Workspace:
Ensure you are working in a well-lit, clean area to avoid any contamination of the filter or its housing.
-
Turn Off the Engine:
Always make sure the vehicle is turned off, and the keys are removed from the ignition for safety purposes.
-
Inspect the Filter Housing:
Before inserting the new filter, clean the filter housing with a brush or cloth to remove any dust or debris that may interfere with the filter’s performance.
-
Align the New Filter:
Carefully place the new air filter into the housing, ensuring it fits snugly and is oriented correctly. Pay attention to any directional arrows on the filter itself.
-
Secure the Housing:
If your filter housing requires screws or clips, make sure to reattach them securely. Avoid over-tightening as this can cause damage.
-
Check for Proper Seal:
After installation, check that the filter is sealed properly to prevent unfiltered air from entering the engine. A proper seal is crucial for optimal performance.
-
Test the Engine:
Start your vehicle and listen for any unusual sounds. Ensure that the engine runs smoothly, indicating a successful installation of the new air filter.
By following these tips, you can confidently install your new air filter and maintain the efficiency of your Ford vehicle.

