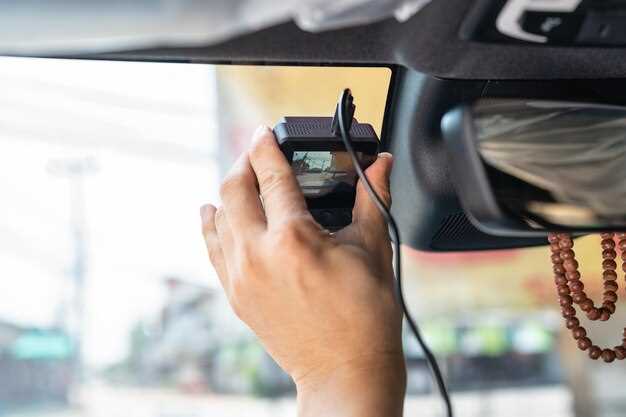
Installing a backup camera in your Ford can significantly enhance your driving experience by improving visibility and ensuring safety while reversing. This guide aims to provide a comprehensive overview of the steps involved in installing a camera, making the process accessible for both seasoned DIY enthusiasts and newcomers alike. A backup camera not only offers peace of mind but can also prevent accidents and obstacles that might be hidden from your view.
Before diving into the installation process, it’s crucial to understand the different types of cameras available on the market. Options range from standalone devices to those integrated into rearview mirrors or even infotainment systems. Choosing the right camera for your specific Ford model is essential, as compatibility can vary widely between different vehicles.
This guide will cover the necessary tools and materials, provide a step-by-step installation procedure, and highlight common challenges faced during installation. By following these steps, you can successfully equip your Ford with a backup camera, ensuring safer maneuvers and greater awareness of your surroundings.
Selecting the Right Backup Camera for Your Ford Model
When it comes to enhancing the safety of your Ford vehicle, choosing the right backup camera is crucial. Not all cameras are created equal, and different Ford models may have specific requirements or compatibility issues. Here are some key factors to consider when selecting the ideal backup camera for your vehicle.
1. Compatibility with Your Model: Ensure that the backup camera you choose is specifically designed for your Ford model. Most manufacturers provide compatibility information, so check your model year and trim level to avoid purchasing an incompatible unit.
2. Resolution: Opt for a camera that offers high resolution for a clearer image. A resolution of 720p or higher is recommended, as it provides better detail when reversing, enhancing safety by reducing blind spots.
3. Field of View: A wide field of view is essential for a backup camera, ideally around 120 degrees or more. This allows you to see more of what’s behind you, making it easier to spot obstacles or pedestrians.
4. Night Vision: Consider a camera with night vision capabilities. This feature ensures that you can see clearly in low-light conditions, which is vital for safe reversing at night.
5. Installation Type: Backup cameras come in various types: wired, wireless, or integrated. Choose one that suits your DIY skills and comfort level. Wired systems usually offer better reliability, while wireless options may be easier to install.
6. Price and Warranty: Price is an important factor, but it shouldn’t be the only consideration. Look for a camera that offers a good balance between quality and cost. Additionally, a warranty can provide peace of mind about your investment.
By considering these factors, you can make an informed decision that enhances the safety of your Ford vehicle while ensuring ease of use and functionality. Investing in a quality backup camera is a proactive step towards safer driving and a more confident reversing experience.
Step-by-Step Installation Process for Your Ford Backup Camera

Installing a backup camera in your Ford involves several clear steps to ensure a proper and effective setup. Begin by gathering the necessary tools and components. You will typically need a backup camera kit, a screwdriver, wire strippers, electrical tape, and possibly a multimeter for testing electrical connections.
Start the installation by disconnecting the vehicle’s battery to prioritize safety and prevent any electrical hazards. Next, remove the vehicle’s interior panels where the camera wiring will be routed. Consult your Ford’s manual for specific panel removal instructions, as this varies by model.
With the panels removed, locate the reverse light wiring in the rear of the vehicle. This is where you will connect your backup camera. Strip the ends of the reverse light wires to prepare for the connection. Carefully connect the camera’s power wire to the reverse light’s positive wire, ensuring a secure fit. Use electrical tape to cover the connections to prevent short circuits.
Next, connect the ground wire from the camera to a suitable grounding point on the vehicle’s chassis. This step is crucial for the camera to function correctly and enhance safety. After the wiring connections are secure, route the camera’s video cable to the front of the vehicle, where the display or monitor will be installed.
Once the wiring is complete, position the backup camera on the vehicle’s rear. Most cameras come with a mounting bracket which should be secured according to the manufacturer’s instructions. Ensure the camera has a clear view and is not obstructed by any parts of the vehicle.
After securing the camera, reassemble the interior panels and reconnect the vehicle’s battery. Turn on the ignition and shift into reverse to test the camera’s functionality. Ensure that the display activates when the vehicle is in reverse, confirming that all connections are correct. Adjust the camera angle as necessary for optimal view coverage.
Finally, conduct a safety check by observing the camera’s ability to provide a clear and reliable image. Make adjustments to the positioning if needed. Once satisfied with the setup, complete the installation by securing all wiring and rechecking that all components are securely fastened.
Troubleshooting Common Issues After Installing a Backup Camera

After installing a backup camera in your Ford, you may encounter several common issues that can affect the camera’s performance and compromise your safety. Here are some troubleshooting tips to help you resolve these problems effectively.
1. Poor Image Quality: If the image is unclear or grainy, check the camera lens for dirt or obstructions. Cleaning the lens with a microfiber cloth can often enhance visibility. Additionally, ensure that the camera is properly aligned and mounted securely to avoid any vibrations that could distort the image.
2. No Power to the Camera: If the backup camera is not powering on, double-check the wiring connections. Ensure that the power supply is correctly connected to the vehicle’s electrical system. Also, verify that the fuse related to the backup camera circuit has not blown.
3. Display Issues: If the camera feed does not appear on the display, confirm that the monitor is set to the correct input source. Inspect the video cable for any signs of damage or loose connections. Reconnection of the cable or replacing damaged components may be necessary.
4. Delay in Image Display: A lag in the image appearing on the screen can lead to safety concerns while reversing. Ensure that your system’s firmware is up-to-date, as updates often enhance performance. Additionally, check for any unnecessary extensions in the wiring that might be contributing to the delay.
5. Interference from Other Electronics: If your backup camera experiences interference, try to keep its wiring away from other electronic components in your Ford. Shielding the cables with electrical tape or relocating them can often resolve this issue.
6. Reverse Trigger Not Engaging: If the backup camera doesn’t activate when the vehicle is in reverse, inspect the reverse light switch or the trigger wire connection. Ensuring that the reverse light circuit operates correctly is essential for the camera to engage automatically.
By addressing these common issues, you can ensure that your backup camera remains functional and contributes to your overall safety while driving your Ford. Regular checks and maintenance are key to keeping the system in optimal condition.


